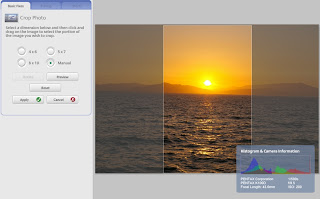
This post is a follow up to Picasa post. Picasa Cropping is the indispensable feature in the 'Basic Fixes' section. One may not bother about cropping but you find it indispensable once you manage to use the feature to crop out the unwanted areas of a picture. Though Picasa backs up the original picture in the subfolder or directory named 'Original', I usually back up a copy in the same directory so that mentally I feel safe in editing a picture that is of value to me. The precautionary step is totally not necessary as Picasa can restore your original even after you save the picture. And it is worth mentioning again that the editing changes in Picasa is not saved to disk until you 'save' in Picasa through either the menu with 'File -> Save' or right click on a changed picture and select 'save'
Various tips on cropping:

- Copy the original in File explorer and work in Picasa based on the 'Copy' version -- not a must step but I feel at ease in experimenting on the 2nd copy or the 3rd copy
- Pick on the intended cropping selection on 4x6, 5x7, 8x10 and manual. This is very important if you intend to print the picture later on. Even if you don't intend to print it, the selection on size on 4x6, 5x7 and 8x10 will have a guide for you once you start dragging the corner for expansion and contraction in finding the ideal cropping area.
- Use the guided size for an approximate crop, and then use 'manual' crop for the final cropping adjustment
- Preview until you get satisfied, then save.
- I usually have two working copies of the original and have two crop results to compare side by side until I get settled for one
0 comments:
Post a Comment